2012年12月18日 星期二

【D.I.Y 聖誕樹】D.I.Y Christmas tree

星期日去了入貨買料理,巧遇這棵£1抱子甘藍(brussels sprout stalk) (◕ω ◕),已聯想到可大變身成為聖誕樹! ♥ 回到家已即刻找材料妝扮成為聖誕樹!!! 哈哈哈!! 找了廢物再用。2,3下已完成! 
登!登!登!!!.....變身完成!!! <( ̄︶ ̄)> 大家喜歡我的作品嗎?
當時完成後,這棵聖誕樹也帶給我們一點歡樂時光!身邊的朋友看見也笑卡卡~
大家是否想知道,我是用什麼材料造成呢?那~我公開製作過程!請收看以下

【D.I.Y 聖誕樹】D.I.Y Christmas tree
製作時間: 5-10分鐘
材料:
  • 1棵抱子甘藍(brussels sprout stalk)
  • 紙皮
  • 啡色紙皮膠紙
  • 1粒芝士(mini Babybel gouda)
做法:
1.)將紙皮對摺成為長方形,然後用來圍繞著棵抱子甘藍下面,令到棵抱子甘藍能夠平衡站立,再用膠紙包紮。
這粒星星的秘密,我現在話你知!
2.) 準備好一粒芝士(mini Babybel gouda),拆開吃掉粒芝士。
3.) 然後留下的外殼,質感很像泥膠。所以就當作泥膠般,造成粒星星。

Enjoying

2012年12月17日 星期一

聖誕甜品【咖啡泡芙】Coffee cream puffs

因做蛋糕留下了的咖啡忌廉,突然很想吃泡芙,便入了廚房做了!
在焗製時一直看著由麵漿變成大大粒脹卜卜的泡芙!!感到興奮開心!哈哈!!!! (當時在旁邊說: 變大la~變大la~~~♥)
記得上次一做泡芙已有一年多,上一次是做小形,今次做大大形。分別是做的過程中,小形比大大形在焗製時間短一倍時間。若大家第一次做的話,我會建議你做小形的泡芙,因小形會較容易成功。 祝大家成功! []~( ̄▽ ̄)~*
聖誕將近,大家可以做來當聖誕甜品,也不錯啊!
【咖啡泡芙】
準備時間:5分鐘,烹調時間:1小時15分鐘,合計時間:1小時20分鐘。
分量:12個
材料:
  • 60克中筋麵粉
  • ¼ 茶匙鹽
  • 1/3 茶匙砂糖
  • 60克牛油
  • 120ml水
  • 2隻雞蛋,打散成蛋液
咖啡忌廉材料:
  • 250ml 鮮奶油
  • ½ 茶匙雲呢拿香油
  • 1 ½ 飯匙砂糖
  • 1 ½ 茶匙咖啡粉
  • 2/3 茶匙熱水
【Coffee cream puffs】
Prep time: 5 mins, cook time: 1 hour 15 mins, Total time: 1 hour 20 mins.
Makes: 12
Ingredients:
  • 60g plain flour
  • ¼ teaspoon salt
  • 1/3 teaspoon caster sugar
  • 60g unsalted butter, cut into pieces
  • 120ml water
  • 2 eggs, lightly beaten
Form the coffee cream:
  • 250ml double cream
  • ½ teaspoon pure vanilla extract
  • 1 ½ tablespoons granulated white sugar, or to taste
  • 1 ½ teaspoons coffee powder
  • 2/3 teaspoon hot water
做法:
1.) 預熱烤箱200℃ / 180 fan / 5 度。
2.) 將麵粉,鹽和糖篩入碗內。
3.) 加熱平底鍋,把牛油和水煮沸至混合。
4.) 加入2,並不停攪拌至混合成麵團。
5.) 離火,並放涼約5分鐘和攪拌,直至麵團微暖。
6.) 加入蛋液,繼續攪拌直至順滑成漿。
Directions:
1.) Preheat oven to 200℃ / 180 fan/ gas mark 6.
2.) In a bowl, sift together the flour, sugar and salt.
3.) Combine butter and water in a saucepan and bring to boil.
4.) Add in 2 mixture all at once and stir constantly until the dough comes away from the sides of the saucepan.
5.) Remove from heat and let cool about 3-5 minutes, stirring occasionally, until the dough is lukewarm.
6.) Start adding the lightly beaten eggs and continue to mix until you have a smooth thick paste.

(並可將麵漿拉出一絲的帶狀)
(Dough will fall from a spoon in a thick ribbon.)
7.) 用茶匙分12份在烤盤上,並每份分開5cm距離。然後用刷子輕巧地塗上蛋汁。
8.) 並放入已預熱的烤箱焗15分鐘,然後將溫度下降至190℃ / 170 fan / 5 度,烤25-30分鐘,直至發脹至爆裂和琥珀色。
7.) Spoon 12 small mounds of dough onto the baking sheet, spacing about 5 apart. With a pastry brush, gently brush the tops of the dough with a lightly beaten egg.
8.) Put them into the preheated over and bake for 15 minutes, then drop the temperature to 190℃ / 170 fan/ gas mark 5 for 25-30 minutes, until the shells are a nice amber colour and when split, are almost dry inside.
9.) 取出,並將泡芙轉移到涼架上冷卻。
9.) Transfer puffs to a wire rack and let cool completely.
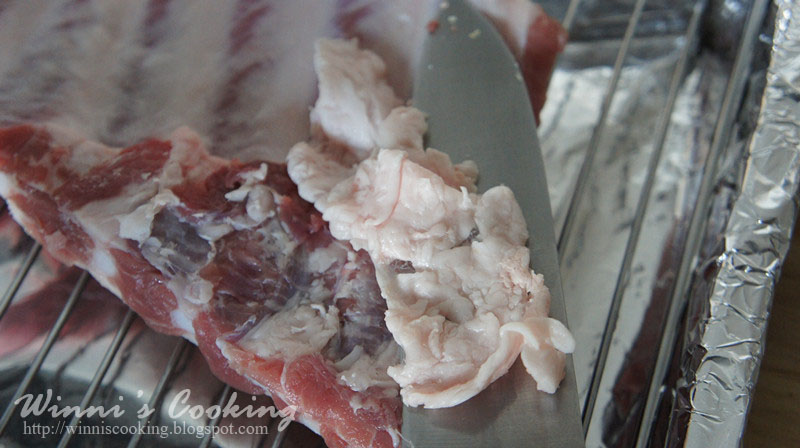
10.) 同時,拿小刀刺穿每個泡芙,有兩個孔,以允許蒸汽和濕氣排出。
10.) Take a knife and pierce each puff with two holes to allow the steam and moisture to escape.
11.) 最後,把裝在奶油袋的咖啡忌廉,在泡芙的一個孔內並填滿咖啡忌廉。
11.) Dig a hole and fill another pastry bag with a small round tip with the coffee cream and pipe the cream inside the puffs.
咖啡忌廉做法:
1.) 將咖啡粉和熱水結合在碗內。
2.) 在一個大碗,把鮮奶油,雲呢拿油,糖和1攪拌至有明顯的花紋便可。
3.) 並放入雪櫃冷藏至少15分鐘。
How to make coffee cream:
1.) Combine coffee and water in a bowl.
2.) In a large mixing bowl place the double cream, vanilla extract, sugar and coffee with water and stir to combine. Whip the coffee cream just until stiff peaks form.
3.) Cover and chill the bowl and whisk in the refrigerator for at least 15 minutes.

Enjoying

2012年12月13日 星期四

聖誕美食【蔓越莓(小红莓)鬆餅】Cranberry Muffins

朋友來,做了甜點招呼朋友! 大家吃完也讚好吃 ,感到小小喜悅!♥
來自冬天的水果味帶點酸,但很有營養含抗氧化的多酚類物質,適當服用有增強免疫系統,防止泌尿感染的作用。紅紅的很有聖誕節氣氛,用來做聖誕美食,是不錯的選擇!
 蔓越莓(小红莓)鬆餅
準備時間:10分鐘,烹調時間:18-20分鐘,合計時間:30分鐘。
分量:6個
材料:
  • 200克中筋麵粉
  • 1茶匙泡打粉
  • 1/4茶匙鹽
  • 40克牛油
  • 70克砂糖
  • 1隻雞蛋
  • 150ml牛奶
  • 1/2茶匙雲呢拿油
  • 120克蔓越莓(小红莓)
Cranberry Muffins
Prep time:10 mins, Cook time:1 hour 18-20 mins, Total time:30 mins.
Makes: 6
Ingredients:
  • 200g plain flour
  • 1 teaspoons baking powder
  • 1/4 teaspoons salt
  • 40g butter
  • 70g caster sugar
  • 1 egg
  • 150ml milk
  • 1/2 teaspoons vanilla essence
  • 120g cranberries 
 做法:
1.) 預熱烤箱200℃/ 180 fan/ 6度。
2.) 將麵粉,泡打粉和鹽結合在碗內。
3.) 加熱牛油和糖在平底鍋,煮約1分鐘至牛油溶化,並離火放涼,然後用電動打蛋器,打滑發白。
4.) 加入雞蛋繼續打至結合,並加入牛奶和雲呢拿油繼續打至結合。
5.) 加入2打至順滑。
6.) 加入蔓越莓,並輕輕拌勻。
Directions:
1.) Preheat oven to 200 / 180 fan/ gas mark 6.
2.) In a bowl,combine the flour,baking powder and salt.
3.) Heat up the butter with sugar in a pan for about a minute, until it's thoroughly melted. Set it aside at room temperature to cool, but don't let it solidify again.
beat until light and fluffy.
Beat the butter with the sugar until light and fluffy.
4.) Add in the egg,then add the milk and vanilla essence.
5.) Add in 2 to make a soft mixture.
6.) Lightly fold in the the cranberries and mix roughly.
7.) 倒入鬆餅模,約8成(2/3)滿。
7.) Spoon the mixture into the prepared muffin cases, about 2/3 full.
8.) 並放入已預熱的烤箱焗18-20分鐘,烤至發脹和淡金色
9.) 取出,並將鬆餅轉移到涼架上冷卻,至和暖或室溫下享用。
8.) Put it into the preheated over and cook for 18-20 minutes,until risen and pale golden on top.
9.) Transfer the muffins to a wire rack to cool. Serve them warm or at room temperature.
 
Enjoying

2012年12月12日 星期三

聖誕美食【迷迭香烤雞】Rosemary Roasted Chicken

聖誕倒數12日生日倒數11日,愛煮食一族是否在計劃聖誕餐單呢?
而我還未知道聖誕生日的行程...男朋友不說行程,玩神秘!所以我只能現在有時間便煮聖誕美食迎接聖誕來臨。烤雞是一個很好的聖誕美食,做法簡單容易,只選擇你喜愛的香草,然後加適量油,鹽,黑椒,香草塗搽在雞的面表和內部,放入烤箱焗1小時20分鐘便可。

迷迭香烤雞
準備時間:10分鐘,烹調時間:1小時20分鐘,合計時間:1小時30分鐘。
分量:4-6人
材料:
  • 1隻雞 (約15kg)
  • 2隻中洋蔥,切件
  • 5瓣大蒜,去皮
  • 1kg 小馬鈴薯 (土豆)
  • 3條蘿蔔,去皮切件
調味料:
  • 橄欖油或菜油
  • 3飯匙乾迷迭香或4飯匙新鮮迷迭香,切碎
  • 適量鹽和黑椒,調味
Rosemary Roasted Chicken
Prep time:10 mins, Cook time:1 hour 20 mins, Total time:1 hour 30 mins.
Serves: 4-6
Ingredients:
  • 1 whole chicken (about 15kg)
  • 2 medium onions, quartered
  • 2 garlic cloves, peeled
  • 1kg baby potato
  • 3 carrots,peeled and cut into chunks
Form the Store-cupboard:
  • olive oil or vegetable oil
  • 2 tablespoons dried rosemary, crushed or 4 tablespoons minced fresh rosemary
  • salt and black pepper,for seasoning
做法:
1.) 把馬鈴薯洗刷乾淨,然後用叉子在每一個馬鈴薯上刺多個孔。 
2.) 將馬鈴薯和蘿蔔放入烤盤內。
3.) 預熱烤箱200℃/ 180 fan/ 6度。
Directions:
1.) Wash potatoes and prick multiple holes in each potato with a fork.
2.) Put the potatoes and carrot on a baking sheet.
3.) Preheat oven to 200 / 180 fan/ gas mark 6.
4.) 將隻雞洗淨和抹乾,並切除開口位的多餘脂肪肉。
4.) Rinse whole chicken and wipe dry,And then cut away the fat at the opening of the cavity.
5.) 淋上橄欖油在雞上,並塗搽全身和內部。
5.) Drizzle the chicken with olive oil, rubbing it all over the bird.
6.) 灑上適量鹽黑椒和乾迷迭香,並塗搽全身和內部。
6.) Add dried rosemary and season well with salt and pepper, rubbing it all over the bird.
7.) 將洋蔥和大蒜放入內部。
7.) Put onions and garlic inside the chicken’s cavity.
8.) 將隻雞放入2在蔬菜上面,並放入已預熱的烤箱焗1小時20分鐘。
8.) Put the chicken to 2 on top of the vegetables in the roasting tray and put it into the preheated oven. Cook for 1 hour and 20 minutes.
9.) 煮熟並關掉烤箱擊,休息5分鐘左右。
9.) When cooked, take the tray out of the oven and transfer the chicken to a board to rest for 5 minutes or so.
Enjoying

2012年12月8日 星期六

聖誕美食【叉燒醬烤豬仔骨】Pork Ribs with Barbecue sauce

聖誕美食隨了有烤雞烤肉之外,也別忘記烤豬仔骨這美食。自家烤豬仔骨嫰滑又入味,做法一樣很簡單。
平時我會喜歡用燒烤箱(Grill),但近排很熱氣,轉移用烤箱(Oven)焗豬仔骨,效果也很好不差,但我個人覺得用燒烤箱(Grill)燒過會較為香口好吃些少。
大家可以參考做法
 叉燒醬烤豬仔骨
準備時間:5分鐘,烹調時間:40分鐘,合計時間:45分鐘。
分量:2-3人 
材料:
  • 1排豬仔骨
叉燒調味料:
  • 3飯匙叉燒醬-李棉記
  • 1飯匙蕃茄醬
  • 2瓣大蒜,壓碎
Pork Ribs with Barbecue sauce
Prep time:5 mins, Cook time:40 mins, Total time:45 mins.
Serves: 2-3
Ingredients:
  • 1 slabs of pork ribs
Form the Barbecue sauce:
  • 3 tablespoons Char Siu Sauce - Lee Kum Kee
  • 2 tablespoons tomato puree
  • 2 garlic cloves, crushed
叉燒醬做法:
在1個碗內,將叉燒醬,蕃茄醬和碎大蒜拌勻結合。
How to make Barbecue sauce:

In a small bowl,combine the Char Siu Sauce, tomato puree and crushed garlic.
 做法:
1.) 洗淨豬仔骨和抹乾,並切除多餘的脂肪肉。
2.) 把排骨放在烤盤內烤架上。(烤盤內烤架是很重要,因為在烤肉時會流出多餘的肉汁,而盤著汁滴。)
3.) 預熱烤箱200℃/ 180 fan/ 6度。
Directions:
1.) Rinse pork ribs and wipe dry,And then trim off any fat from the meat.
2.) Place the pork ribs, bone side down, on a rack inside a baking dish.(The rack is important so that even the underside of the pork will be touched by the oven's dry heat. The baking dish is to catch the drippings.)
3.) Preheat oven to 200 / 180 fan/ gas mark 6.
4.) 刷上叉燒醬在豬仔骨,刷完後可以看到表面有一層叉燒醬。
4.) Brush the pork ribs with barbecue sauce. Brush every visible surface of the cooked pork ribs. Liberally. Really slather on the barbecue sauce.
5.) 並放入烤箱焗30-40分鍾,中途刷多一次叉燒醬。
6.) 讓休息至少5分鐘後從烤箱中取出。
7.) 完成,並可配薯條或沙律。
5.) Put the pork ribs in the over and cook for 30-40 minutes. And Brush with more barbecue sauce half way through.
6.) Let rest for at least 5 minutes after removing it from the oven.
7.) Serve it with fries or salad.

Enjoying

2012年12月5日 星期三

【彩椒圈煎蔬菜蛋】Fried Eggs with Vegetables in Pepper Rings

家常菜,通常最見得多是炒蛋配搭火腿,雞肉,蝦,什錦豆,韭菜,菜脯或其他蔬菜肉類等來做配菜。一來做法省時又簡單,二來健康又營養,而且每次有炒蛋,令人特別開胃,也添多碗飯吃。
其實我一直以來很喜歡吃彩椒的味道!所以今次將甜彩椒切圈加入蔬菜蛋,用中火煎成一個餅形,好似煎餅,很有口感,外面半生熟,內裹熱熱香口,而且很色彩繽紛,令人更有食慾。
【彩椒煎蔬菜蛋】
準備時間:5分鐘,烹調時間:5分鐘,合計時間:10分鐘。
分量:2-3人 
材料:
  • 2個彩椒 (任何顏色),切圈約1cm厚
  • 1碗什錦蔬菜
  • 2隻雞蛋,打成蛋汁
調味料:
  • 1飯匙橄欖油
  • 2飯匙芝麻油
  • 適量鹽,調味 
Fried Eggs with Vegetables in Pepper Rings
Prep time:5 mins, Cook time:5 mins, Total time:10 mins.
Serves: 2-3
Ingredients:
  • 2 fresh peppers (any colour),cut into 1 cm thick rings.
  • 1 bowl mixed vegetables
  • 2 eggs,beaten
Form the Store-cupboard:
  • 1 tablespoon olver oil
  • 1 teaspoon sesame oil
  • salt,for seasoning

做法:
1.) 加熱平底鍋,放入什錦蔬菜,芝麻油和少許鹽,兜炒約1分鐘,離火放入碗備用。 
2.) 落油加熱平底鍋,放入彩椒圈。
3.) 同時,把1加入在彩椒圈內和把蛋汁倒入彩椒圈內,煎1-2分鐘,然後小心地反轉繼續煎1-2分鐘。
4.) 完成,並可配飯食用。
Directions:
1.) Heat up the pan and then add the mixed vegetables,sesame oil and salt,fry for 1 minute,and then remove from heat and transfer into individual bowl.
2.) Heat up the olive oil in a pan and then add the peppers rings.
3.) Meanwhile,Add 1 into the peppers rings,and then add the beaten eggs into the peppers rings,fry for 1-2 minutes,then gently 
flip it and let it cook another 1-2 minutes.
4.) S
erve it with rice.

Enjoying